Measures of author impact are metrics used to evaluate the impact or influence of a particular author’s scholarly work. These measures are used to assess the quality and impact of an author’s research output, as well as to help determine the visibility and recognition of their work in the academic community. Some common measures of author impact include:

H-index

H-index is a measure of an author’s productivity and impact based on their most cited papers. An author with an H-index of 10 has published 10 papers that have each been cited at least 10 times. This is the most widely used research metric. The h-index was first proposed by physicist Jorge E. Hirsch in 2005. The h-index is based on the number of publications and the number of citations that those publications receive.

Tools for H-index
  • Google Scholar: Google Scholar is a free and widely used academic search engine that also provides a tool to calculate an individual’s H-index. Users can create a profile and add their publications to the profile, and Google Scholar will automatically calculate the H-index based on the publications. Learn more about Google Scholar metrics

  • Scopus: Scopus is a bibliographic database containing abstracts and citations for academic journal articles. It also provides a tool to calculate an individual’s H-index based on the publications indexed in the database. Scopus is most useful in the sciences. Discover more about Scopus Author Metrics.

  • Web of Science: Web of Science is another bibliographic database that provides citation information and a tool to calculate an individual’s H-index. It indexes a variety of scholarly sources, including journal articles, conference proceedings, and books. It is most useful for the sciences, social sciences, and humanities.

  • Publish or Perish: Publish or Perish is a free software program that uses Google Scholar to calculate an individual’s H-index. It provides a range of metrics related to academic productivity, including citation counts, journal impact factors, and co-authorship analysis.

  • InCites: InCites can help compare individuals or institutions to see how your research compares to your peers.  InCites can help form tables and graphs to compare ​people, organizations, regions, research areas, and journals.​​ Video quick tour for InCites and a snap shot

i10-index

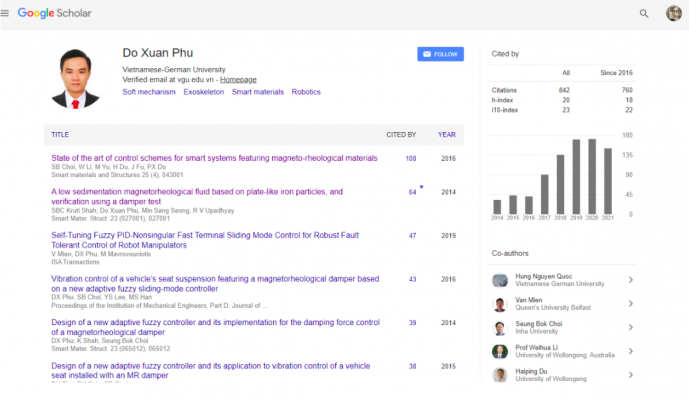
The i10-index is a metric used to measure the productivity and impact of a scholar’s research publications. It is a variant of the h-index, which measures the number of papers that have been cited at least h times. i10-index is only used in Google Scholar. 

The i10-index specifically counts the number of publications that have been cited at least 10 times. So, if a researcher has 20 publications that have been cited at least 10 times each, their i10-index would be 20.

The i10-index can be useful for evaluating a researcher’s impact beyond their most highly cited publications. However, like any metric, it has limitations and should be used in conjunction with other measures of research productivity and impact.

Eg: H-index and i10-index from Google Scholar

Citation count: This is a simple measure of an author’s impact based on the number of times their work has been cited by others. A higher citation count indicates greater impact.

Journal impact factor: This is a measure of the average number of citations received by articles published in a particular journal. Authors who publish in journals with high impact factors are generally considered to have greater impact.

Altmetrics: These are measures of an author’s impact based on online activity surrounding their work, such as social media mentions, blog posts, and downloads.

Expert opinion: This is a subjective measure of an author’s impact based on the opinions of other experts in their field. This may be assessed through peer review or by surveying experts in the field.

It’s worth noting that no single metric can fully capture an author’s impact, and that different fields may place greater emphasis on different measures of impact.


Researcher identifier

A researcher identifier is a unique identifier assigned to an individual researcher to distinguish them from others and to enable their research outputs to be accurately attributed to them. The purpose of researcher identifiers is to provide a reliable and persistent means of identification that can be used across multiple systems and platforms, thereby increasing the discoverability and visibility of researchers and their work.

There are several researcher identifier systems available, such as ORCID, ResearcherID, and Scopus Author Identifier. These systems assign a unique identifier to a researcher and link it to their research outputs, such as publications, datasets, and grants. Researchers can use these identifiers to maintain a comprehensive record of their research outputs, track their impact, and connect with other researchers in their field. Additionally, researcher identifiers can benefit institutions, funding agencies, and publishers by facilitating more accurate attribution and evaluation of research outputs.

Here are several types of researcher identifiers, including:

Research Identifiers

ORCID (Open Researcher and Contributor ID) provides a unique identifier for researchers and scholars, allowing them to maintain a record of their scholarly activities and affiliations. ORCID is an open, non-profit, community-driven organization that aims to solve the name ambiguity problem in scholarly research and improve the discoverability of research outputs.

Follow these steps to use ORCID:
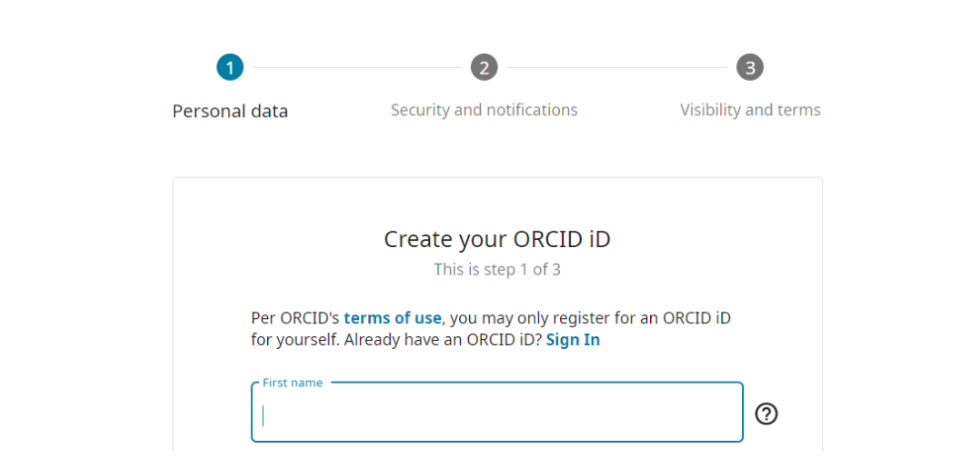
Step 1: Create an ORCID profile

The first step is to create an ORCID profile at orcid.org. This will allow you to register your unique identifier and manage your record.

Step 2: Add your information

Once you have created your ORCID profile, you can add your personal information, such as your name, affiliation, education, and employment history.

Step 3: Connect your works

You can link your ORCID profile to your research outputs, such as publications, datasets, and patents. You can do this by using one of the many ORCID integrations available, including citation managers, publishing platforms, and grant submission systems.

Ways for adding work to your record:

– Direct import your work from other systems to ORCID, such as:

  • ResearcherID 
  • Scopus Author ID

– Import and export works via BibTeX: Import data from Google Scholar profile or EndNote to a BibTeX (.bib) file, then into your ORCID record. BibTeX is a platform for bibliographic citations.

– Add works manually

Step 4: Share your ORCID iD

Your ORCID iD is a unique identifier that can be shared with publishers, funders, and other research organizations. Sharing your ORCID iD will enable them to connect your research outputs to your record, reducing the chance of name ambiguity and ensuring that you receive credit for your work.
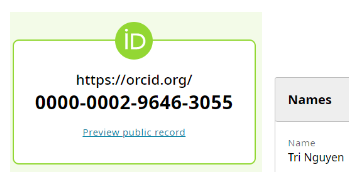
The ORCID iD is a 16-digit number that is compatible with the ISO Standard (ISO 27729), also known as the International Standard Name Identifier (ISNI), e.g https://orcid.org/0000-0002-9646-3055. Your ORICD iD is fully owned and controlled by you.

Step 5: Keep your record up to date

It is important to keep your ORCID record up to date, including your personal information and research outputs. This will ensure that your record accurately reflects your scholarly activities and affiliations, making it easier for others to discover your work.

Google Scholar Citations is a free service that enables researchers to create a profile of their research work and track their citations. It provides a unique identifier that can be used to link publications and citations.

Here are guidelines for using Google Scholar Citations effectively:

Step 1: Create a Google Scholar Citations profile

To create a profile, sign in to Google Scholar with your Google account and click on the “My Citations” link. Follow the instructions to create your profile.

Step 2: Add your publications

Once you have created your profile, add your publications by clicking on the “Add” button. You can add your publications manually or import them from your Google Scholar profile.

Step 3: Verify your publications

After you have added your publications, it is important to verify that the information is correct. Check the title, authors, and other details to make sure they are accurate.

Step 4: Track your citations

Google Scholar Citations allows you to track the number of times your publications have been cited by other researchers. You can view this information on your profile page.

Step 5: Keep your profile up-to-date

It is important to keep your profile up-to-date by adding new publications and verifying their information. This will ensure that your citations are tracked accurately.

Step 6: Use Google Scholar Citations to network

Google Scholar Citations can also be used to network with other researchers. You can follow other researchers and see their publications and citations.

Step 7: Be aware of limitations

While Google Scholar Citations can be a useful tool, it is important to be aware of its limitations. The citation counts may not be always accurate, and it may not include all publications or citations. We can combine with other databases (Scopus and Web of Science) for double checking.

Scopus Author ID is a unique identifier assigned to researchers by Scopus, a bibliographic database of peer-reviewed literature. It allows researchers to track their publications and citations.

It is designed to help researchers distinguish their work from that of other authors with similar names and to create a complete and accurate record of their scholarly output.

To obtain a Scopus Author ID, you need to have at least one publication indexed in Scopus. Once you have published an article indexed by Scopus, the database will automatically create an author profile for you, which will include your name, affiliation, publication history, and citation metrics. You can claim your author profile and manage your publications by registering for a free Scopus account and linking your publications to your profile.

Having a Scopus Author ID is beneficial for researchers as it helps in establishing their research identity, increasing their visibility and credibility, and tracking their research impact through citation metrics such as h-index and citation counts. Additionally, Scopus Author ID can also be used for collaborations and networking with other researchers.

The following contents are some guidelines for using Scopus Author ID:

Step 1: Ensure your name is consistent

To ensure your publications are correctly linked to your author profile, it is important to use a consistent name across all your publications. Use the same name format and spelling in all your publications.

Step 2: Register for a Scopus account

You need to have a Scopus account to manage your author profile and publications. You can register for a free account on the Scopus website. Check whether your account has already been created by Scopus.

Step 3: Check your publications

It is important to regularly check your author profile to ensure that all your publications are correctly linked to your profile. If you notice any errors or missing publications, you can contact Scopus support to request a correction.

Step 4: Use ORCID to synchronize your publications

ORCID is a unique identifier that allows you to synchronize your publications across different platforms, including Scopus. By linking your Scopus Author ID with your ORCID, you can ensure that all your publications are correctly attributed to you.

Step 5: Keep your profile up-to-date

It is important to keep your author profile up-to-date with your latest publications and affiliations. This will ensure that your profile reflects your current research output and impact.

ResearcherID is a unique identifier assigned to researchers by Thomson Reuters. It is integrated with Web of Science and allows researchers to create a profile, associate publications with your profile, and track citation metrics.

Here are some guidelines for setting up and using your ResearcherID:

Step 1: Create a ResearcherID account

To create a ResearcherID account, go to the Web of Science website and click on the “Register” button.

Step 2: Verify your email address

After you register, you will receive an email with a link to verify your email address. Click on the link to complete the verification process.

Step 3: Complete your profile

Once you have created your ResearcherID account, you can complete your profile by adding your photo, bio, research interests, and other information.

Step 4: Add your publications

You can associate your publications with your ResearcherID by importing them from other databases, such as PubMed or Scopus, or by manually entering them. It’s important to ensure that all of your publications are correctly associated with your ResearcherID so that your citation metrics are accurate.

Step 5: Track your citation metrics

Your ResearcherID profile includes citation metrics, such as your h-index and total number of citations. You can use these metrics to track the impact of your research over time.

Step 6: Share your ResearcherID

You can share your ResearcherID with colleagues, collaborators, and other researchers to make it easier for them to find your publications and track your research impact.

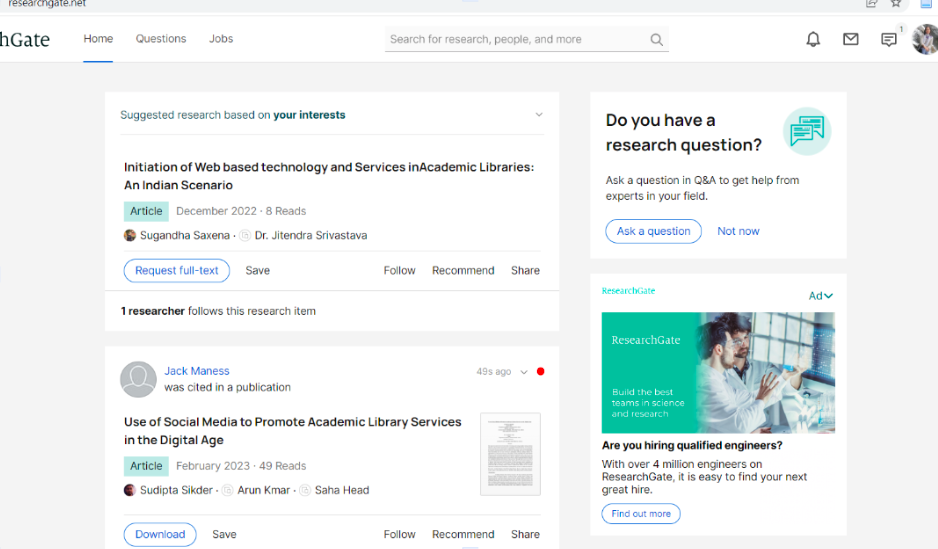
ResearchGate is a social networking site for researchers. It provides a unique identifier that allows researchers to connect with colleagues and share their publications and research findings.

Here is the guideline for using ResearchGate:

Step 1: Create a complete profile

Fill out your profile with your name, institutional affiliation, research interests, and a professional profile picture.

Step 2: Share your research works

You can share your research papers, conference presentations, posters, and other research outputs on the platform. Make sure you have the legal right to share the content and that it does not violate any copyright laws.

Step 3: Engage in discussions

You can participate in discussions on the platform by commenting on other researchers’ works or asking questions. Keep the discussion professional and respectful.

Step 4: Follow relevant researchers and topics

You can follow researchers or topics that are relevant to your research interests to keep up-to-date with the latest research.

Step 5: Be respectful

Keep all interactions on the platform professional and respectful. Avoid using offensive language or making derogatory remarks.

Step 6: Keep your profile up-to-date

Regularly update your profile with your latest research works, publications, and achievements.

Step 7: Use the platform responsibly

Be mindful of the platform’s policies and guidelines and use it responsibly. Do not engage in any unethical behavior, such as plagiarism or data falsification.